Ok,
This is a bodger fix and modification, for a stock 2012 KLR650, but I'm sure it will work on other bikes, as long as they have some good hard foam and at least a few inches of it. Credit goes to my mate Simon form Alberta who gave me the idea.
So I had problems with my feet tippy toeing off the motorbike when I'im stopped. You can buy a lower seat which may cost $150 + ,
or get lowering links which cost around $100 - I didn't like the thought of this as I've heard it decreases your suspension travel - on a reasonably low KLR ground clearance anyway.
Step 1: get yourself a roll of gorilla duct tape (normal duct tape is rubbish I think), a builders staple gun with thick staples (obviously not the staple gun for paper!), a small bladed knife (ie pocket knife) and something to cut the foam. I used a bowie knife and a hack saw blade and it took a while, a large sharp serrated bread knife and or a hack saw blade with widely spaced teeth would also work much better.
Step 2: Take the seat off the bike and unpick all of the staples starting at the rear of the seat and working towards the front with a small blade- but don't unpick say the 10 staples at the very front of the seat. Peel the seat liner forward to the front exposing the foam. You'll also see some clear plastic which is a waterproof skin over the foam - pull that forward too.
Step 3: Check the density of the foam - if its soft as hell or it is too low anyway, it may not be a good idea to do it, as when your riding, you might compress to far down and hurt yourself on plastic on the seat underside.... ouch! However if it is very dense, thick quality foam, it wont compress and you'll be fine to do this.


Step 4: Next start shaving back the foam with your chosen blade and shaping with contours - I was able to take off an inch quiet easily right where I sit - I didn't bother with where the passenger sits.
Make sure you don't take off too much! Or you will feel the underside of the plastic and have little compression when you go over bumps. You can keep cutting, then folding back the plastic and putting the seat back on the bike to see how it feels to check the height and comfort. Also try give it some curved shape on the sides so your thighs don't rub on a 90 degree angle.

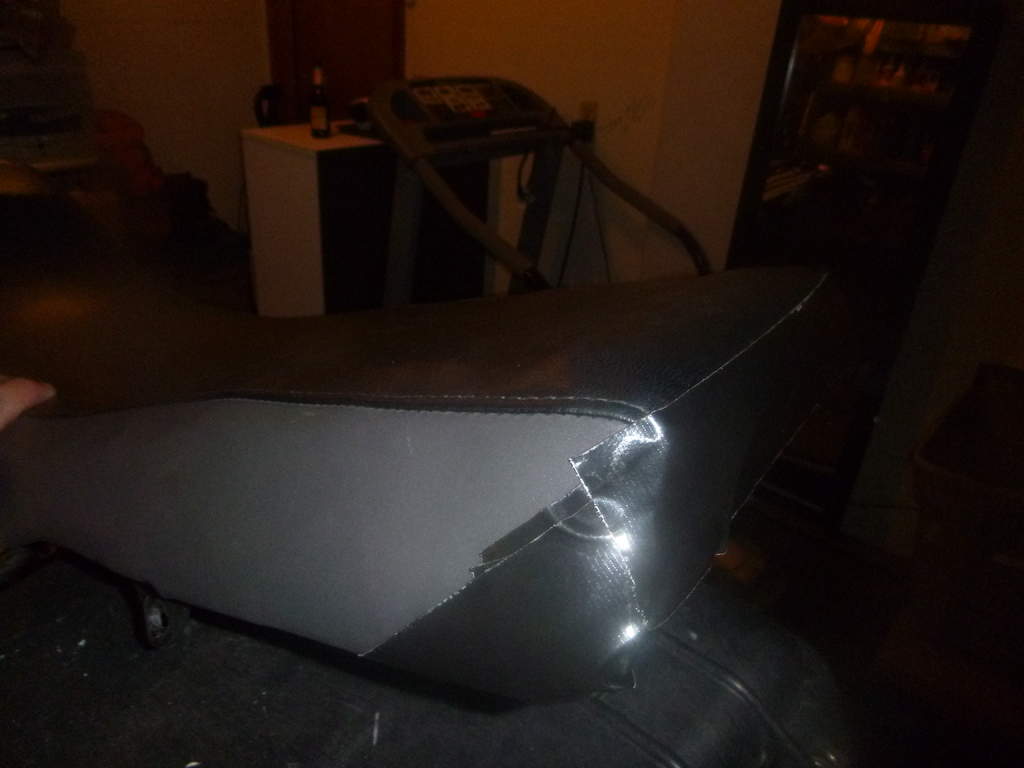
Step 5: Once your happy with the shape you've created, get a friend to help. Fold back the plastic and seat cover. You'll see that it will be a little short at the very back and you wont be able to put staples in it - don't worry, you can seal that with the gorilla tape later. Start at the front, getting your friend to pull the cover tight over the seat while you put a heap of staples in. Do say 100mm at a time each side of the seat - the whole time having your friend pulling it down tight both sides - and towards the rear simultaneously to exactly where it has to be. If you pull it as tight as you can before stapling, it will look as tight and as good as the original seat - if your friend doesn't pull it tight enough, it will be saggy and you will slip around on the seat while riding. So make it tight!

p
Step 6: Once you have put all the staples in, Cut some pieces of duct tape to seal the end and make it neat - make sure its super clean with spirits or alcohol so the tape sticks well. You can put a few staples through the tape as well if you want.
Step 7: Put seat back on bike.
I rode 35,000kms from Idaho to Argentina with this modified seat, and only got a minor sore arse after a 7 days of extreme off road riding - that I probably would have got anyway. I also had a thin 1cm Alaskan Leather Merino Wool Sheepskin Buttpad on. But I guess riders have different thresholds of pain.
Hope it works for you - if it wont, don't destroy your seat!
cheers
Dom