Frank,
Depending on the amount of "mist" in the picture you may not be able to get it to a point you like. It would be good to see a sample of what you want to edit so we could give you more detailed instructions.
First I would say that if the mist is very heavy from the foreground to the background then you may only achieve moderate results at best. If your foreground is clear, as is often the case, but the mountains and valleys in the distance are all "fogged" up then there may be some hope. It's also worth noting that the the following is also useful for reducing light amounts of lens-flare which can tend to "wash" out an image.
If you don't know how to use layers and masks in Photoshop, this is the time to learn. The technique is much more complicated than I'll describe here but will attempt to give a short description of the process.
Using masks and layers, you'll have to isolate different parts of the image and selectively remove the fog. The most effective way to do this is to create a layer for each section of the image and use a "curves adjustment layer" attached only to that layer to contrast "lift" the fog out (accomplished by holding -alt- and clicking on the line between the adjustment layer and image layer). Additionally, mist often casts a hue and in the curves adj. layer you can also compensate for this by selecting the most appropriate individual color channel thereby reducing it's intensity.
It's best to see this in action so I've supplied a couple of my PSD's (800wide) for you to download, open up in Photoshop and check them out for yourself. Often, this is NOT as easy and opening up an image and applying only one global curves adjustment layer. Explaining the magic of "curves" is well beyond the scope of this post and you should do some of your own research.
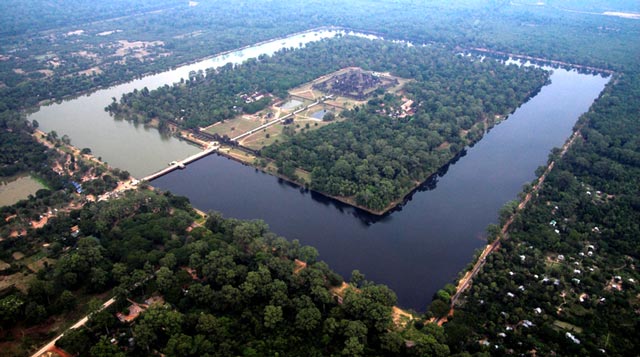
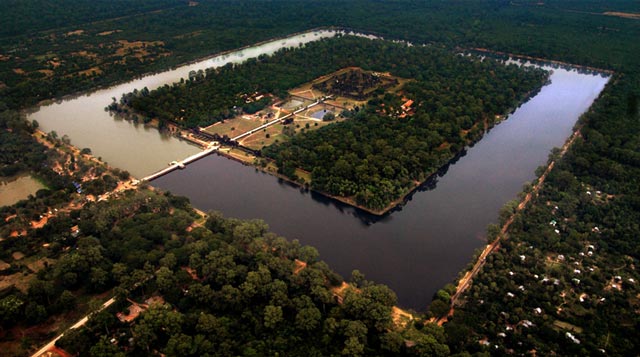
The following image is a shot taken from a helicopter (my only 'copter shot) in Cambodia over AngkorWat. We were unfortunate to lift off on a very cloudy afternoon and the mist from the original shot was image-crippling and also gave the image a STRONG color cast as stated above. See examples below...
Download AngkorWat sample PSD here...(~4.5mb)
http://www.carlparker.com/photos/Cambodia - SiemReap - Angkor Wat - Aerial.psd
Before

After

If you open the PSD file, you'll see little eye-balls in the layers panel which show or hide the layer. The bottom layer is the original image. Slowly un-click the eyeballs starting from top down to see the changes, then re-click them again from bottom up. After that, try examining the individual "curves adjustment layer" settings and play with them yourself.
The process is much like tuning a carb. First you overcompensate in one direction, then the other, until you find a spot that works. These are relatively simple examples and can get much more complicated than this. On some images, especially if there are people in them, you easily can end up with over a dozen layers!
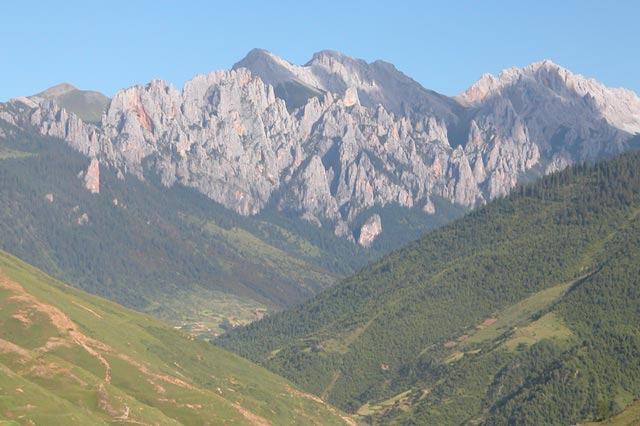
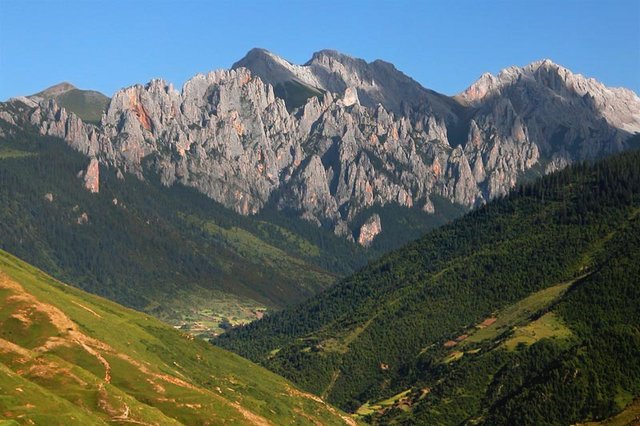
Below is another example taken from a pass in Tibet. In this one, it would look like a single global adjustment would work fine but actually, it won't do the image (or place) justice. Check it out and try it for yourself! It's only a click away.
Download Tibet04 sample PSD here...(~6.7mb)
http://www.carlparker.com/photos/Tibet04-028.psd
Before

After

Mastering Photoshop is one of the best things you can do for your photography and you'll find that there are no quick and easy ways to proper "digital-darkroom technique". Additionally, each and every image is different and will require taking different considerations into account when post-processing.
Use of a polarizer, as others have suggested is always good as long as it doesn't slow the shutter speed too much (as they reduce the amount of light to the sensor and will only have limited effect in heavy fog conditions where the light is heavily diffused). Any work you can do to reduce the problem BEFORE you take the shot will save you hours of post-processing later so both parts are extremely important. As a side note, if you shot digital what you want is a CIRCULAR polarizer...not linear. Polarizers take some time to learn how to use properly and in what lighting conditions. Check out Luminous-Landscapes great article on polarizers and why you should use a circular type. Actually, it's a great site to check out first for tips and reviews regarding any landscape photography.
Polarizers at Luminous-Landscape.com
As you become more familiar with the software, you'll find that more and more of your images previously thought unusable have a new life! I suggest you pick up some training software. Lynda.com has a good selection and is WELL worth the time and money.
Happy riding and shoot some un-fu*cking-believable sh*t!
Let's see some pics!!!
CrazyCarl