Hi there,
a mate and me just started our RTW on Honda XR650Rs and would like to share our build for those who might be interested. Took me ages to find bits and pieces of info for a long distance build in various forums, so I thought this info might be of some use now.
Also posted on ADVRider.
We decided to take XR650Rs (sorry about the XR650RTW - it's just too hard to resist...

) for their awesome reputation, power and lightness. Most people seem to tend towards taking a rather big and comfy bike with loads of carrying caps and try to get it into kind of a rally machine, loosing weight here and there and farkling up for more off road ability. We decided to go the other way around. Also we felt a necessity (maybe rooted in us being Germans...

) to show that one does not need the latest and fattest Bavarian cow (no insult intended) totally tourachteched up to go the way. Keep in mind, we are in our mid twenties, and cannot do it by ways of money. Me being a student and my mate just graduated, ways of cheap travel are a must.
As it took me ages to get bits and pieces of info together I felt this might be a way to thank for all the goodness and knowledge you guys shared by showing what we tried to to with it. Surely there are better and more sophisticated ways of building an adventure machine, but we are pretty happy with our humble rides and are keen to learn and see them advance as we go along.
As I am writing this we are in Turkey, east of Istanbul at the Black Sea, waiting for our visa for Iran. We had some 4000 and something km to try the bikes and are quite fond of them so far. So here is what we came up with:
The bikes (mine named Agnes, my mate's Desiree) were completely rebuilt. Having no workshop or man cave of any kind available, I persuaded my five roomies to abandon our 3x2m basement box for a while, so we could store two XRs in parts and all the tools available to us. As you can imagine this is not much space to work, so I started checking out the bicycle stands in our student's apartment's laundry basement. After a while I knew all the wrecked and neglected rides by name. We made sure to shift them around, so there were a few meters of space, unseen by the other occupants, filled with push bike wrecks no one ever used. Whenever we felt a desire to fiddle around on Agnes and Desiree, we piled the cycles in a corner and had an awesome, heated, electrified and - most notably - free workspace to use.
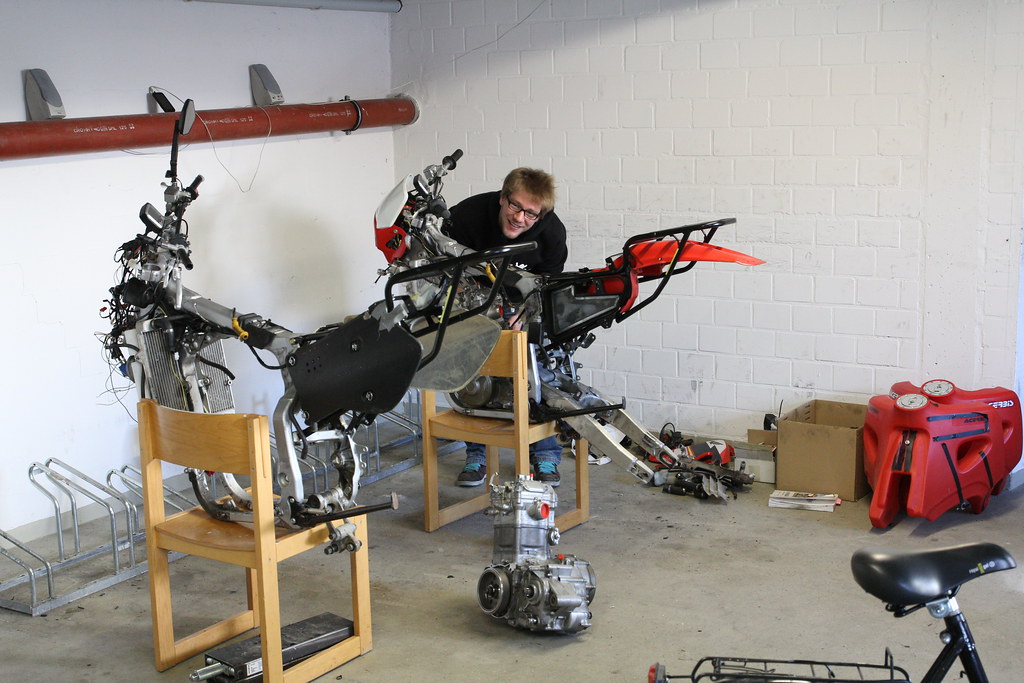 XR650RTW_basement_hannes
 by
jnk@tabain.eu on Flickr
We ordered steel sub frames from Jim from Globetrottin (cheers for the help and discount!) to carry the load and had stronger springs fitted front and rear to support the luggage (hopefully) without dealing any damage to the bike in long term. The frames were a little hard to fit, but now they are properly broken in, it got easier. So far there is no wear on them. What I really love about them is the welded luggage rack - packs my roll and guitalele pretty nice and is great for tugging on the bike once we are off road without any luggage. We will see how they hold up, but I am pretty sure they will do their job. Also they are great for fitting panniers. Only thing I did was closing the up-facing open tube ends with silicone, to prevent them from getting flushed with every rain shower.
 XR650RTW_basement
 by
jnk@tabain.eu on Flickr
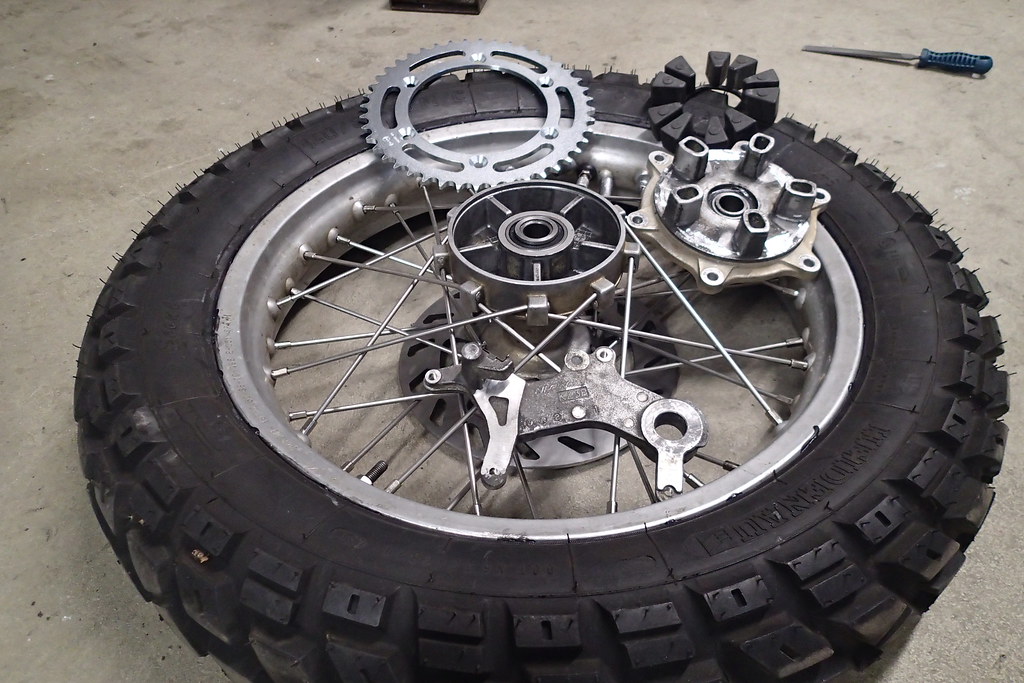 XR650RTW_cush_drive_rear_wheel
 by
jnk@tabain.eu on Flickr
I just did not feel very comfortable with the thought of doing a lot of tarmac on a ride without a cush drive. Buying a cushed hub was not an option considering our budget. So we got some used Husky rear wheels from a TE610E. They are a pretty close fit, just needed some grinding inside the cush drive and on the brake and new spacers. Also they had to be respoked, which was a good opportunity to get stronger stainless spokes. As we bought the XRs with faulty engines (left crankcase bearing gone, so they got a new crank and total rebuild) and lacked the machines, we had the work we could not do ourselves done at a local workshop (wimi-kiel.de

) owned by a pretty cool dude, looking somewhat like a fusion of Uderzo's Miraculix and Doc Brown from Back to the Future. He was a great help and later even handed over they key to his holy halls of workshop paradise, leaving us free to use his tools and endless pool of knowledge while building the bikes. Berndt, if you read this, you have no idea how thankful we are.

His workshop pensioner built our wheels with utmost accuracy, so the XRs got cushed.
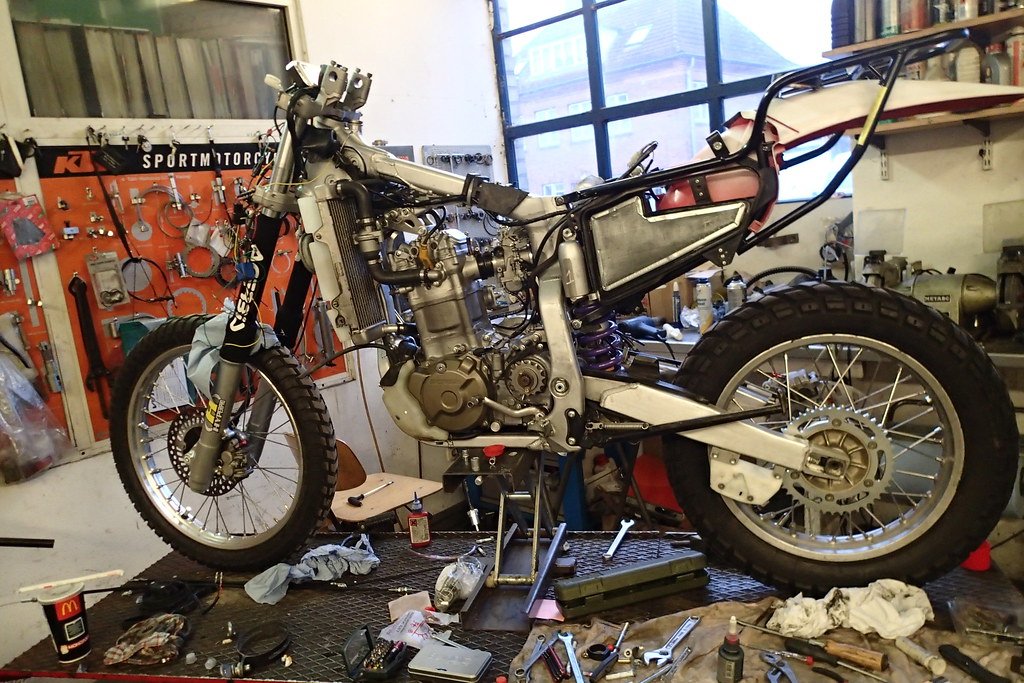 XR650RTW_wimi3
 by
jnk@tabain.eu on Flickr
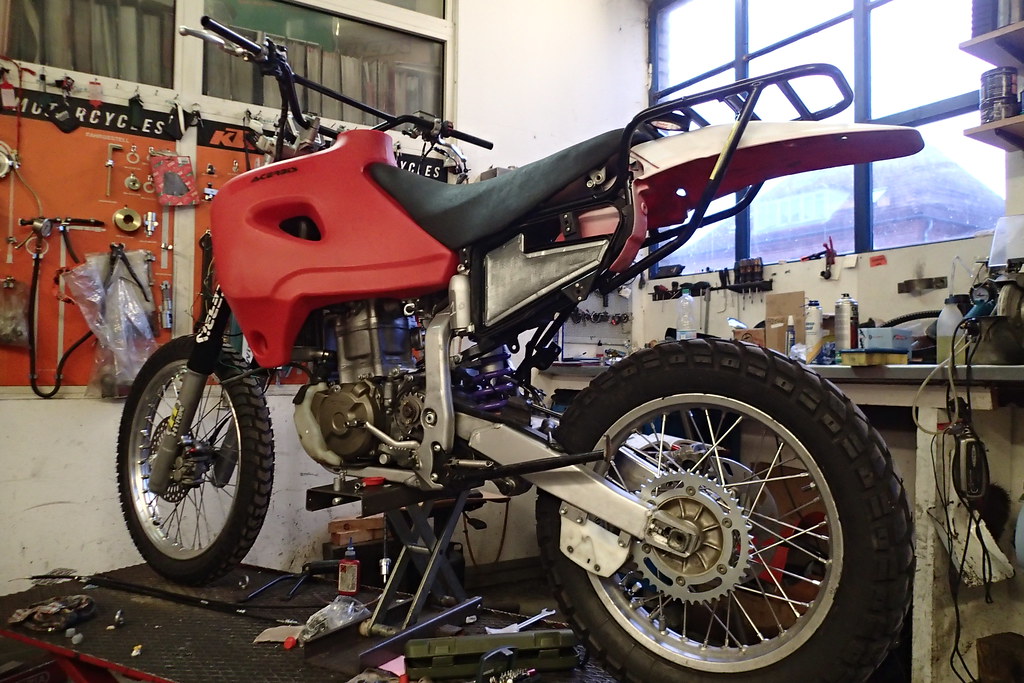 XR650RTW_wimi2
 by
jnk@tabain.eu on Flickr
My bike (Agnes) already came with a Mikuni TM40, ABP headers and an Akrapovic pipe. I added some riser extensions and wider and higher bars for more relaxed standing. Realistically, most of our riding will be roads - my back is rather thankful for some standing and moving around on the bike every now and then.
We changed the gearing to 15/44, carrying a 13t front sprocket for swapping once off the road. I just love the XR for the ease of that. Chains are DID ERV3. Also fitted the obligatory Acerbis tank, supported by some foam tape, so it sits nicely on the frame's surface rather than on the small rubber lining. We added flat aluminium tank caps, giving us a flat surface to work on for the tank bag mount. Agnes already sported a higher seat to cushion my lower parts and got a nice anti-slip lining. We fit stahlflex brake lines by Probrake, who turned out to be a great help. Andreas, the owner, also had some oil sight tubes made for us by adding stahlflex fittings to a telfon tube. Works like a charm and makes the dipstick obsolete, which is really not that accessible and gets worse with the tank, bars and tank bag. We are using Stahlbus oil drain valves on the engines for a clean drain process without flooding the skid plate. Quick, clean and one can just tap a quickie to check the oil. A shame they do not make one small enough for the frame drain bolt...
We also added a proper skid plate, high tension clutch springs and fuel filters, which can be completely disassembled and cleaned. Agnes got some neoprene fork guards and (later) a Turkish drain pipe in front of the skid plate, for storing my tools dry and low.
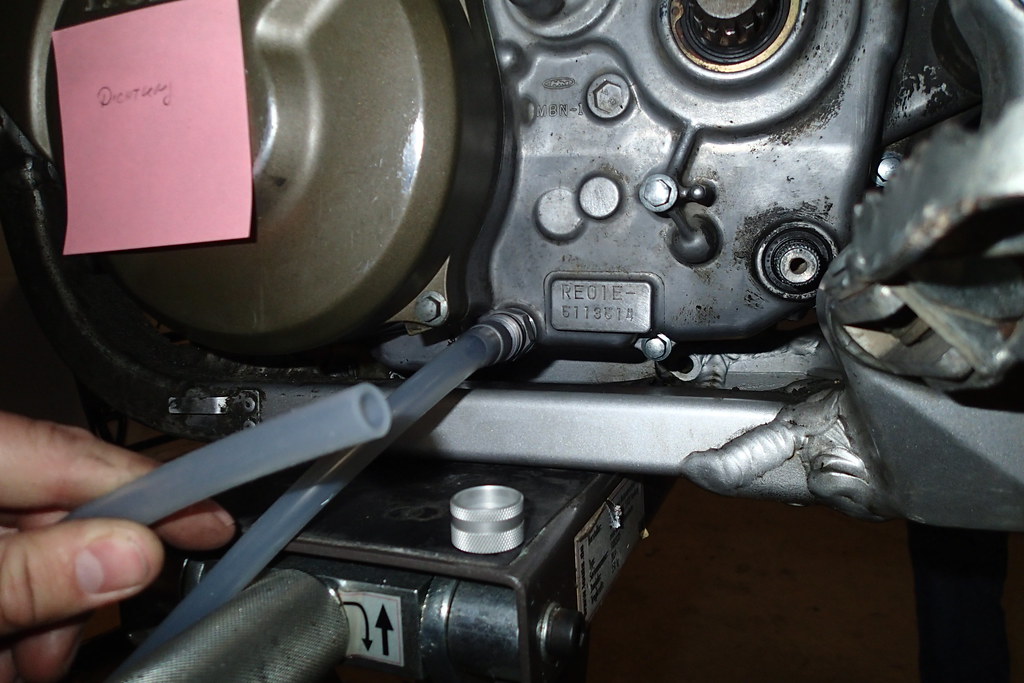 XR650RTW_stahlbus
 by
jnk@tabain.eu on Flickr
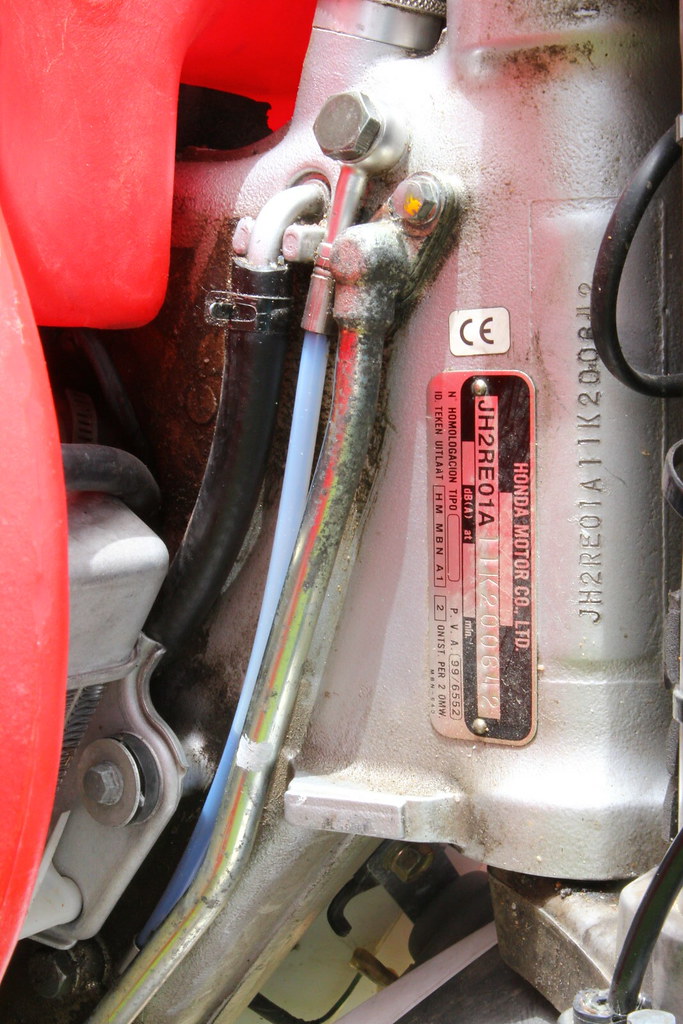 XR650RTW_oil_sight_tube
 by
jnk@tabain.eu on Flickr
We added batteries to the bikes to have a steady power supply and make sure the lights will stay on without a running engine if necessary. This was fitted in Turkey, as we had a pretty hasty start (more on that in the ride report...) and not having it was no fun at all on the Autobahn during a really wet night ride to Berlin...
My mate Hannes decided to keep all the electronic stuff inside of his Enduristan tank bag. I fitted it all to the bike, as my tank bag houses the camera equipment. The battery, a lightweight lithium model by Utrabatt, sits between the rear rack and fender. It is easily detachable, connected via a Super Seal connector. We intended to fit in diodes to make sure the batteries would not discharge when the bike is of, but went with simple switches now. One 12V outlet is fitted on the fender and goes directly to the battery, so it works for charging equipment on the bike, even if the energy is switched off. Put it on the rear so I could charge the bigger electric devices well inside the pack roll while riding. Also it is wired directly to the battery, so I can charge stuff with the bike power switched off. We installed the smallest LED turn signals and rear lights we could find, as they are not easily damaged and draw almost no energy at all. Together with an electronic flash relay, this allows me to put the bike on warning lights at night without having to bother about the battery dying in any reasonable time. The rear position and brake light is mounted on a number plate holder made of 8mm stainless steel tube (same as the pannier holders), attached to the rear rack by pipe clamps , so it can be easily removed or repaired if need be. The rear flash lights are mounted so they can turn freely on the plate holder in case of a crash or badly aimed boot (which works fine

) but are pretty much out of harm's way anyway.
A Scottoiler and LubeTube have also been attached to the sub frame/rack.
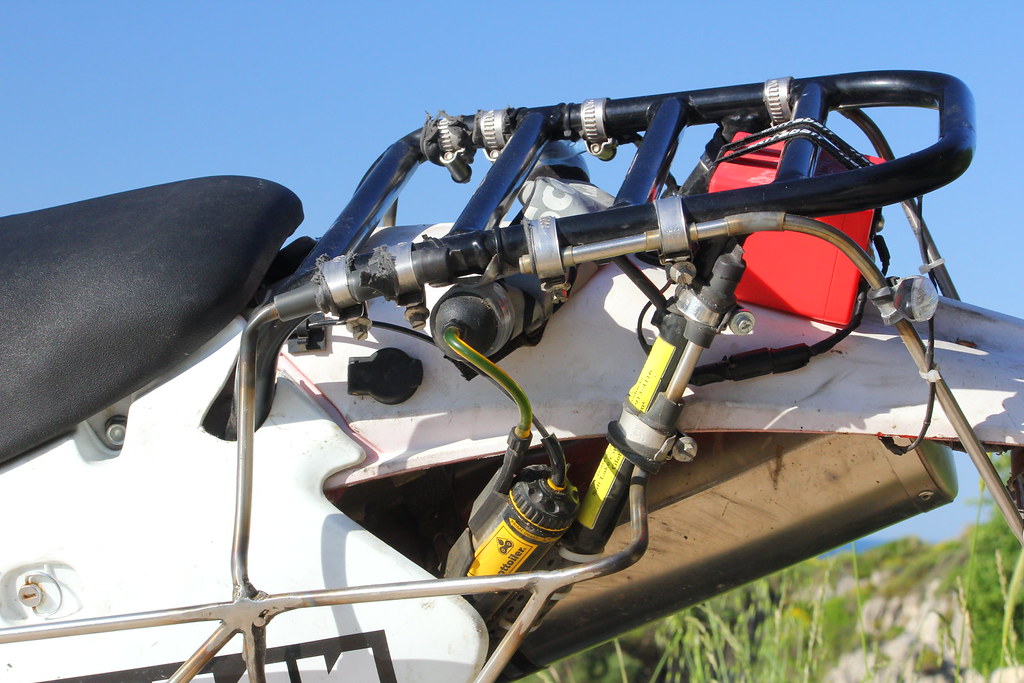 XR650RTW_rear_power_setup_scotty
 by
jnk@tabain.eu on Flickr
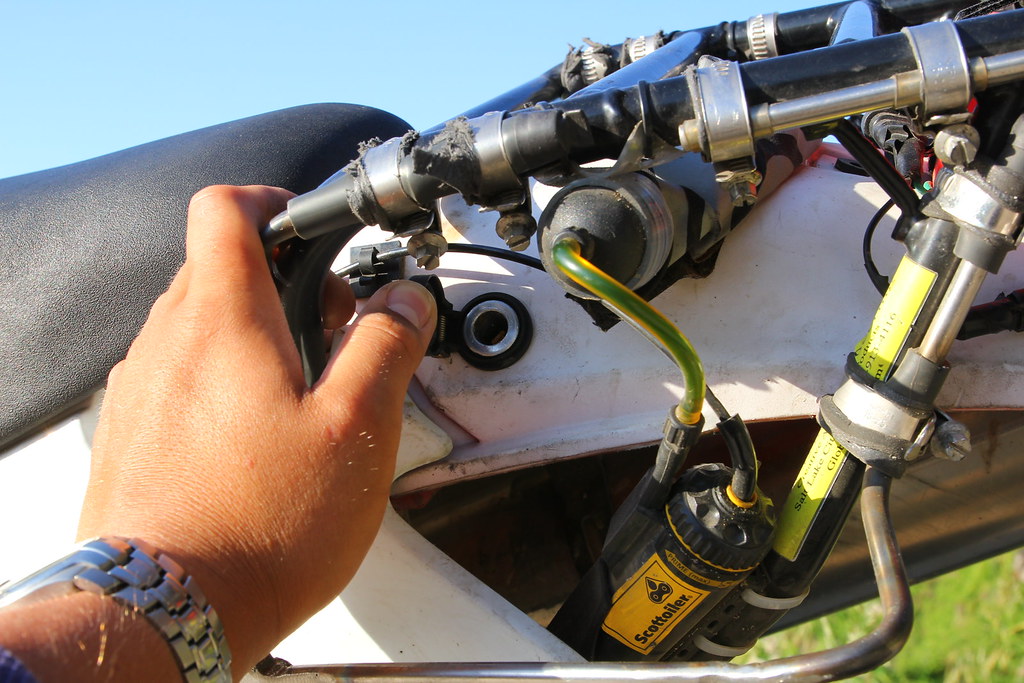 XR650RTW_12V_scotty
 by
jnk@tabain.eu on Flickr
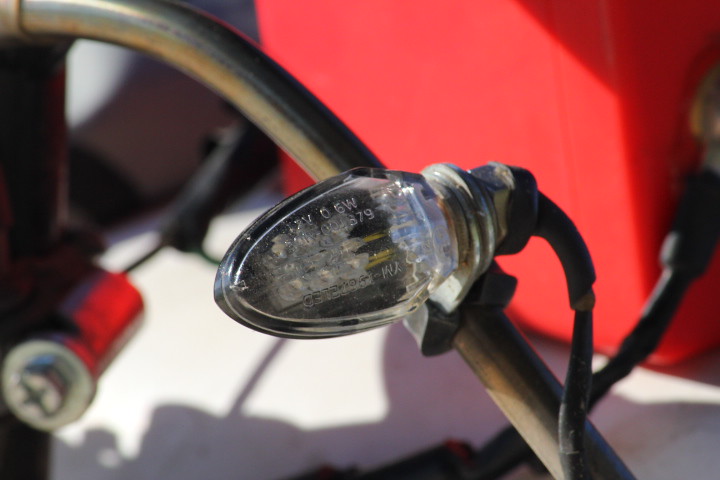 XR650RTW_led_turn_signal
 by
jnk@tabain.eu on Flickr
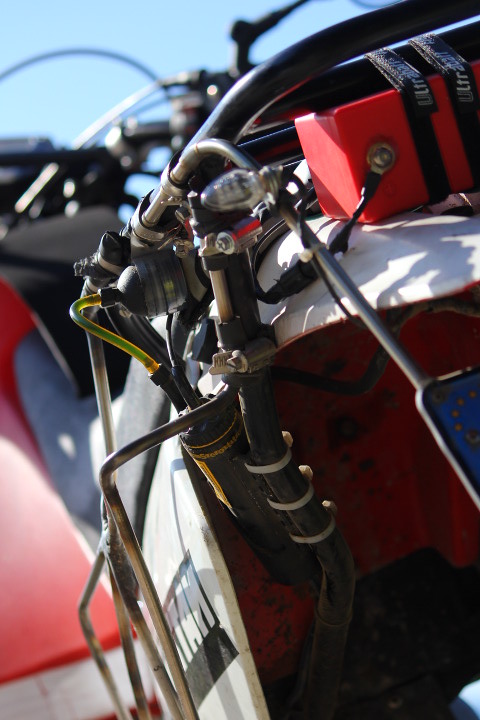 XR650RTW_power_scottoiler
 by
jnk@tabain.eu on Flickr
The cockpit sports an Acewell 3250 speedo and tach, reading all kind of stuff but most important speed, revs and temperature. We tapped the valve housing for the temp sensor. I used an electric speedo cable drive that is just plug and play on the original housing. There is a twin USB port for charging my mobile and other stuff. The left switch on the panel is for the battery, the right for a nice KTM LC4 fan down on the right radiator. This way I can flip on power and read all the useful info from the speedo without starting the engine. It also works for powering my 48W LED flood light, but only a short time (you can see the voltage go down on the speedo every second...). The front turn signals are fit to my hand guards with something called Bondic, basically liquid plastic. You can apply it as a sticky fluid which hardens under UV light, emitted either by the supplied UV LED or sunlight. I use for repairs, modelling or insulation and just love it. Also, we use KTM LC4 mirrors. No bad vibes and easily folded up (supporting my helmet) or in.
 XR650RTW_cockpit_acewell_usb
 by
jnk@tabain.eu on Flickr
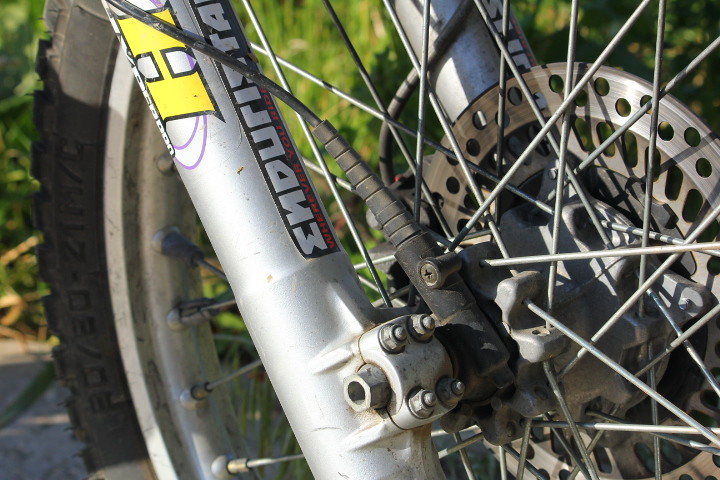 xr650rtw_cable_drive_speed_sensor
 by
jnk@tabain.eu on Flickr
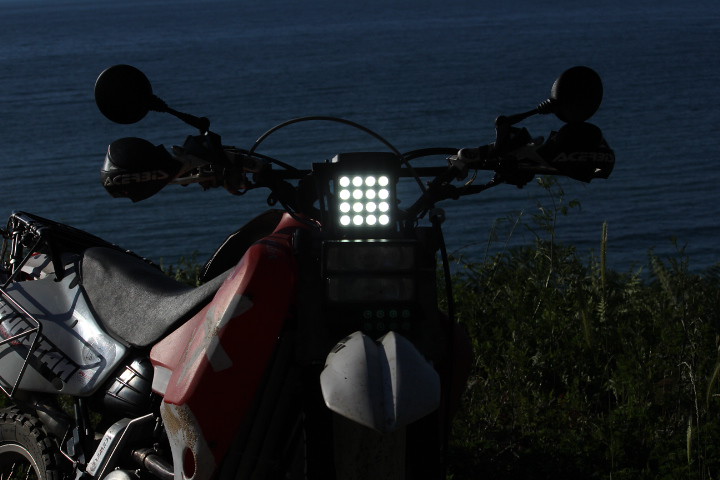
I made a stainless steel plate holding my cables, a dual H1 rally light (from the 80s, had to get a LOAD of dust of it, when I found it a WIMI's

) and the LED flood light. Got it of a shop for farm machine gear, was about 90€ and really lights up the night. The beam is almost at a 180° angle in every direction. I will add a picture of that later, forgot to take one. The downside is the low reach of about 60 or 70 meters, but as I mainly use it off road or on narrow country roads, I do not really mind. Although, getting back at trucks riding with the headlights all turned up is kind of fun.

The H1 dual headlights are hardly more than a position light, as I can only unse on of them at the time with my stock (EU) stator. But they are rather light, fit nicely under the LED and are great for grocery shopping...

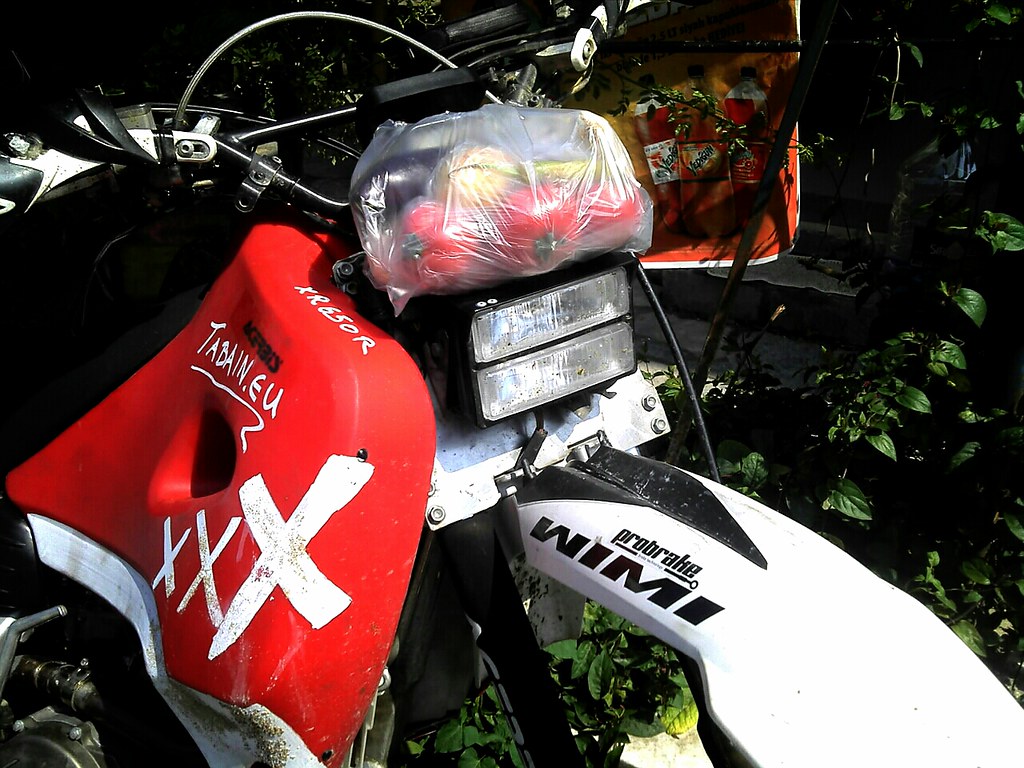 xr650rtw_shopping
 von
jnk@tabain.eu auf Flickr
 XR650RTW_led_headlight
 by
jnk@tabain.eu on Flickr
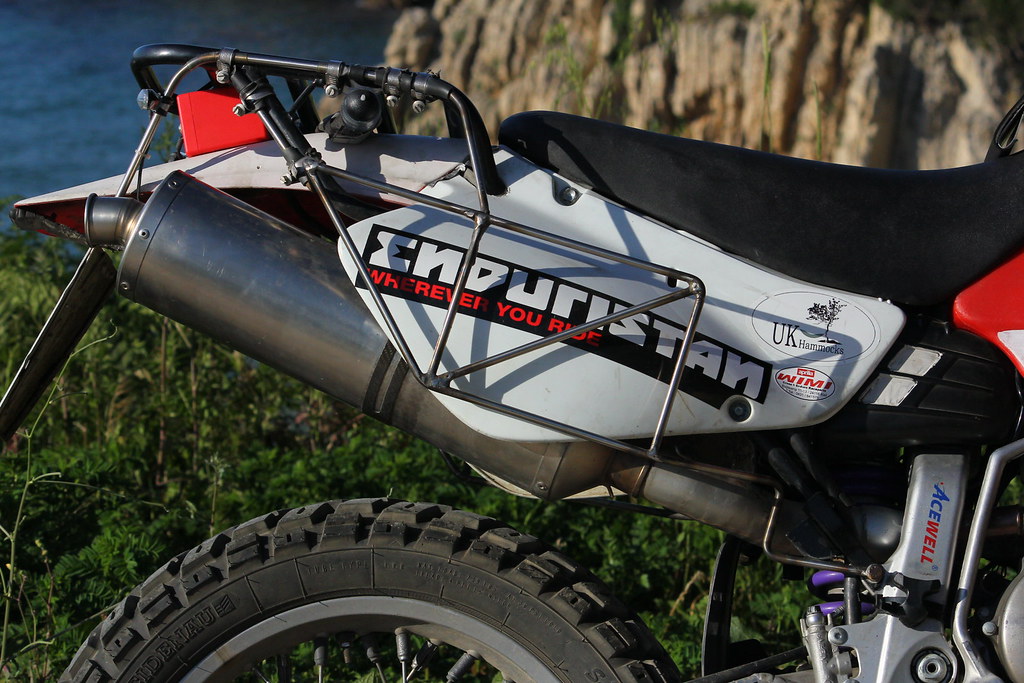
Finally, what I expected to be the biggest issue, luggage, turned out to be no issue at all. We made some pannier racks out of 8mm stainless and got them welded. The sub frame bolts serve as lower mounting points. Two upper mounts are clamped to the sub frame, The whole thing also works as a crash bar and does so very well on and off road. Just need to bend it back where it belongs once the bike is up again.
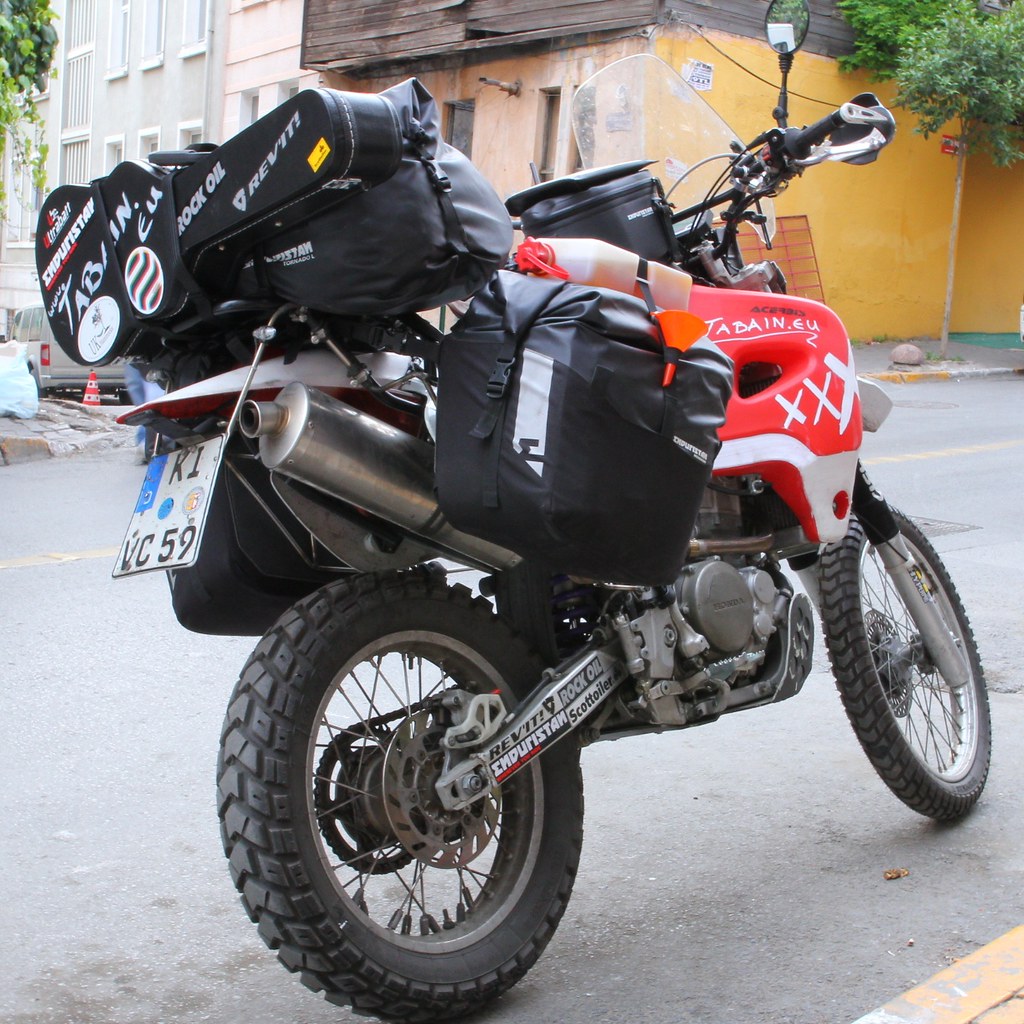
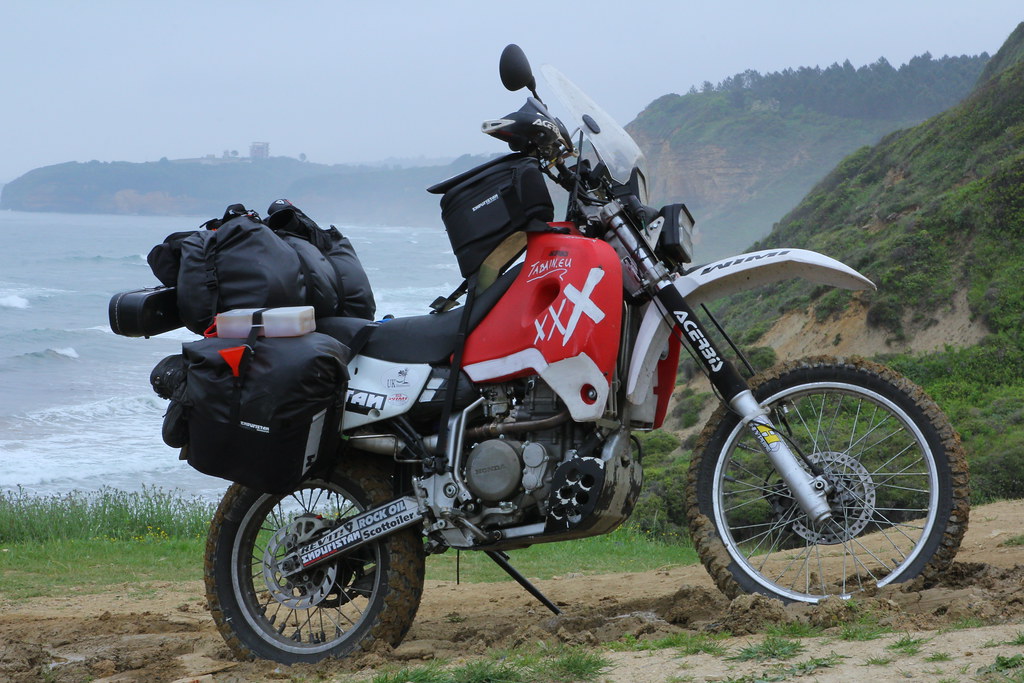
We decided to go with light soft panniers, a small tank bag supported by an aluminium plate and a roll, all by Swiss manufacturer Enduristan. So far they have been doing great. Hannes went with a huge 82L roll, I took the 51L version and strapped my guitalele behind it. Other than that we just carry two Polo Vaude backpacks, which are usually empty except for the water sacks.
For longer legs on the highway we have two windshields, which can be packed in or strapped on the rolls, if not in use.
 XR650RTW_right_pannier
 by
jnk@tabain.eu on Flickr
 XR650RTW_rear
 by
jnk@tabain.eu on Flickr
So, that's it I think.

Any constructive criticism and question are very welcome.
Feel free to check our website, though there will not be any updates before next week or so, as we have to get a laptop. More on that on the ride report, maybe tomorrow...
Ride safe,
Juri
 istanbul_taxi
 by
jnk@tabain.eu on Flickr
 XR650RTW_deserted_campside
 by
jnk@tabain.eu on Flickr
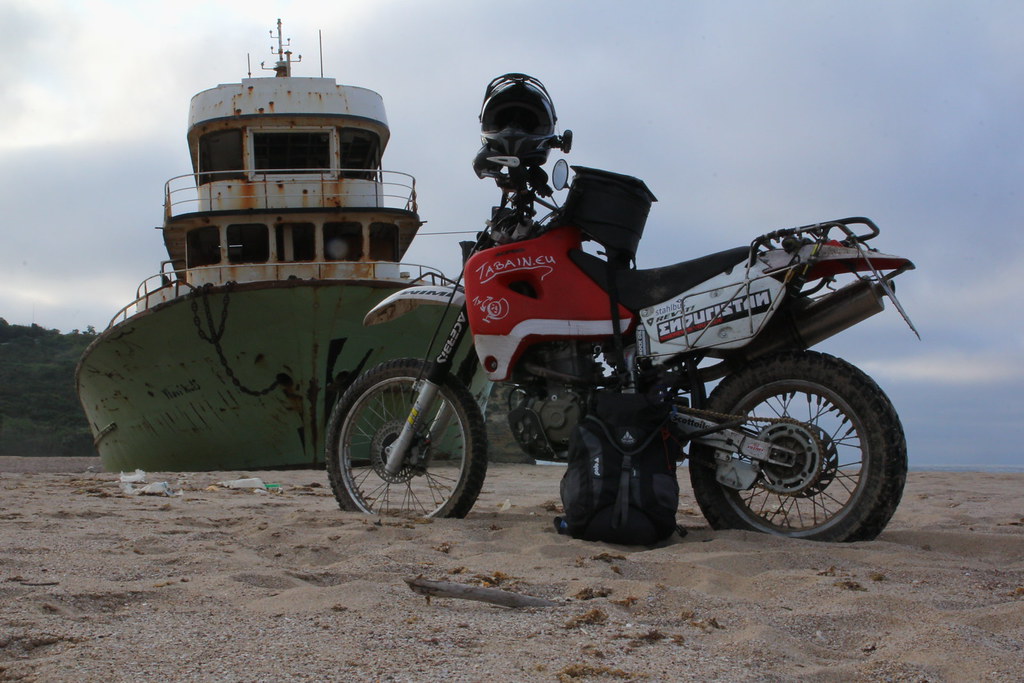 xr650rtw_kutter
 by
jnk@tabain.eu on Flickr